6th Grade Art- Year Round
| Schedule for the Week (4/28-5/2) | ||
| Tuesday | Thursday | Friday |
|
Ceramic Vocabulary Review.
Introduction to Greek Pottery/Vases.
Students will begin to develop a narrative to carve on their vase.
|
Students will finish their visual narrative.
Students will create a template for the shape of their vase.
|
Students will cut out their vase shape and coat it with underglaze.
|

Adam Bertels
Adam Bertels is a freelance illustrator from the Midwest. Take a look at his website. One thing to notice is that while each of Bertel’s design projects represents the client with a clear and cohesive look, each project is unique to the client. His portfolio has a great variety of design skills, from his use of text and color schemes to developing characters for menus, t-shirts, and more. His portfolio shows his versatility and makes him marketable to different clients.
Lesson One: Donut Shop Challenge
Take a closer look at Bertel's work for the donut shop, Strange Donuts.
Consider the following questions:
- How can you tell each of these designs is for the same company?
- What elements of art/principles of design are repeated?
- What makes the Strange Donuts brand stand out?
Once you have thought about the design choices Bertels made, you are ready to introduce a challenge for your students. I want each one of you to create designs for an imaginary donut shop. You can be creative with the shop’s name, menu items, etc. You will need to develop at least three different designs for the shop to use: logo, menu, packaging, website, app, etc. Their designs should be cohesive and go together, but also unique and serve different purposes.

You could take this challenge one step further by choosing a local business. Keeping with the current business logo design and color scheme, come up with designs for new items, an interior design renovation, web design, etc. This could be a fun opportunity to engage with your community and share finished projects with the local businesses.
You could make digital designs at home. Try web-based programs or smartphone apps like Pixlr to experiment with. Your of course welcome to just draw designs out with pencil or pen.
I can't wait to see what you come up with.
Translation Tessellations:

1. Mark out a LIGHT grid on your paper using three inch grids. You can do this with your ruler. Take a 3 X 3" (7.5 x 7.5 cm) index card and start in the left upper corner of your paper, lining up the edges of the index card with the edges of your paper. Trace along the right and bottom edge of your index square. Slide the square to the right, lining up the left edge with the right edge of the first drawn square. Trace along the right and bottom edge of your index square. Continue doing this until the squares cover the paper in a grid formation with all the squares lined up correctly.
2. Draw a wavy line from the top left corner to the top right corner of your index card square.
3. Draw a wavy line from the top left corner to the bottom left corner of your index card square.
4. Cut along these lines ending up with 3 separate pieces
5. Arrange these pieces back in their original position.
6. Slide the top piece down to the bottom edge and line up the flat edges and tape them together.
7. Slide the left piece over to the right edge and line up the flat edges and tape them together.
8. Line up the right original straight edge and the bottom original straight edge of the index card form with the top left grid and trace the outside edges of the form with pencil onto the paper.
9. Slide the form horizontally and/or vertically until it lines up. Trace and continue in this manner.
10. Once you have filled your paper with the forms see if you can create an object from this repeated shape and bring it out in your coloring and detail lines. If not, then color it in a very creative way that will enhance the repeating design.
Create your own tessellation Video: https://www.youtube.com/watch?v=ZNVyrxdlrGQ&feature=emb_logo
Rotation Tessellations:

1. Mark out a LIGHT grid on your paper with the use of the 3 X 3 index card you received and a pencil. Start in the left upper corner of your paper, lining up the edges of the index card with the edges of your paper. Trace along the right and bottom edge of your index square. Slide the square to the right, lining up the left edge with the right edge of the first drawn square. Trace along the right and bottom edge of your index square. Continue doing this until the squares cover the paper in a grid formation with all the squares lined up correctly.
2. Draw a wavy line from the top left corner to the top right corner of your index card square.
3. Draw a wavy line from the top left corner to the bottom left corner of your index card square.
4. Cut along these lines ending up with 3 separate pieces
5. Arrange these pieces back in their original position.
6. Rotate the top piece counterclockwise so the straight edge of the top piece fits against the straight edge of the right side of the index square and tape them together.
7. Rotate the left piece clockwise so the straight edge of the left piece fits against the straight edge of the bottom of the index square and tape them together.
8. Line up the right original straight edge and the bottom original straight edge of the index card form with the top left grid and trace the outside edges of the form with pencil onto the paper.
9. Rotate the form horizontally and/or vertically until it lines up. Trace and continue in this manner.
10. Once you have filled your paper with the forms see if you can create an object from this repeated shape and bring it out in your coloring and detail lines. If not, then color it in a very creative way that will enhance the repeating design.
Reflection Tessellations:

1. Mark out a LIGHT grid on your paper with the use of the 3 X 3 (7.5 x 7.5 cm) index card you received and a pencil. Start in the left upper corner of your paper, lining up the edges of the index card with the edges of your paper. Trace along the right and bottom edge of your index square. Slide the square to the right, lining up the left edge with the right edge of the first drawn square. Trace along the right and bottom edge of your index square. Continue doing this until the squares cover the paper in a grid formation with all the squares lined up correctly.
2. Draw a wavy line from the bottom left corner to the bottom right corner of your index card square.
3. Draw a wavy line from the bottom right corner to the top right corner of your index card square.
4. Cut along these lines ending up with 3 separate pieces
5. Arrange these pieces back in their original position.
6. Flip the bottom piece over and slide it to the top so the straight edge of the top side fits against the straight edge of the bottom piece of the index square and tape them together.
7. Flip the right piece over and slide it to the left side so the straight edge of the right side piece fits against the straight edge of the left side of the index square and tape them together.
8. Line up the right original straight edge and the bottom original straight edge of the index card form with the top left grid and trace the outside edges of the form with pencil onto the paper.
9. Flip the form so it lines up with one of the drawn edges. Trace and continue in this manner.
10. Once you have filled your paper with the forms see if you can create an object from this repeated shape and bring it out in your coloring and detail lines. If not, then color it in a very creative way that will enhance the repeating design.
This video explains the three different types of tessellations that are on this page:

Dishwashing liquid
Warm water
Food coloring
Drinking straws
Bowls
Spoons
Paper

Steps: 1. Mix the dishwashing liquid half and half with the warm water.
2. Pour about 3/4 of an inch of the mixture into a bowl. Add a few drops of food coloring and stir well to mix.
3. Insert a straw into the liquid and blow gently so a tall tower of bubbles forms in the bowl.
4. Place a sheet of paper over the top of the bubbles and lower slowly. Hold the paper in place for about 30 seconds or so until you can see the bubble color begin to seep through the sheet. As the bubbles pop, they create the print.
5. Remove and turn over to admire the design. You can continue to blow bubbles and use the same sheet of paper in different places to make a bubble print over the entire sheet. Experiment with different colors or mix primary colors to make other shades.

6. Let dry and add see what you can turn your designs into using ink or paint.
Video example of the process:
https://www.youtube.com/watch?v=Jd8Sxp69lSo
Video of Bubble Tree Art: https://www.youtube.com/watch?v=fhv6JzyaOSE
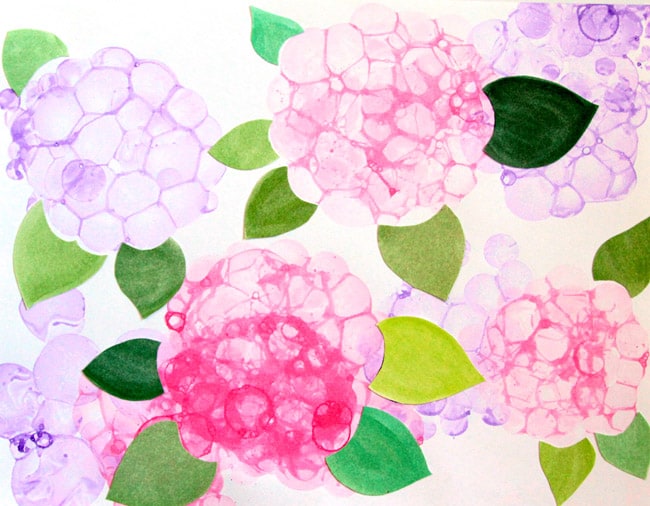
Video of Bubble Hydrangeas: https://www.youtube.com/watch?v=n9pxmCojru4
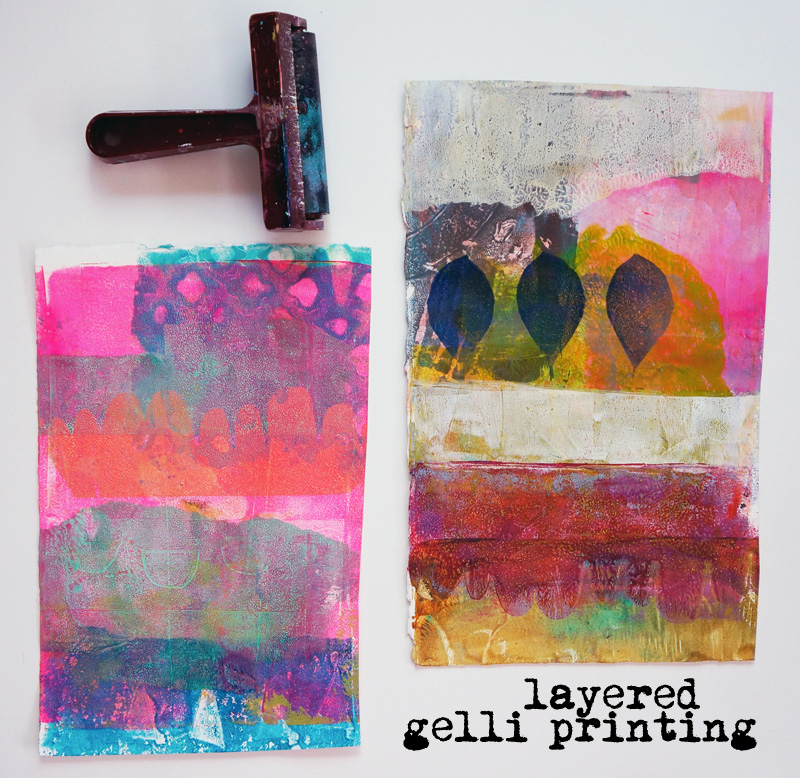
Here are some examples of altered bubble art:


-
- What artwork did you immediately like?
- What artwork stood out to you as something that you would like to try doing?
- What artwork did you not like? Why?
- Practice drawing some of the artworks that you liked seeing. Include the name of the artist and the title of the artwork.


Origami Bookmarks

2. How have paper-folding techniques been applied outside the world of origami? Which of the practical uses described in the article do you find most intriguing or surprising, and why?
3. What are the keys to creative and successful origami making, according to the article? What does the author mean by this statement: “The goal is to arrive at the most efficient and elegant means of achieving a particular effect”?
4. What does Koshiro Hatori, a master folder, mean by the statement: “I feel my works are collaborations between paper and me”? Why is selecting the right paper so important to origami?
5. Why does Toshiko Kobayashi, an art therapist, believe that origami has the ability to heal? Do you think making origami would have a calming or healing presence for you?
6. Look more closely at the photos and select your favorite: Explain why you chose it and what aspects you admire. After reading the article, do you think origami should be more widely appreciated as an art form?


Paper Batik Flower Paintings

Sketch Ideas